Large stucco, siding, or masonry planes sharing one color.
House Color Lab visual manual
From one house photograph to a confident shortlist.
Follow the complete workflow, with special attention to defining accurate paint zones. Good masks make every later color decision more useful.
Step 01 · Create a project
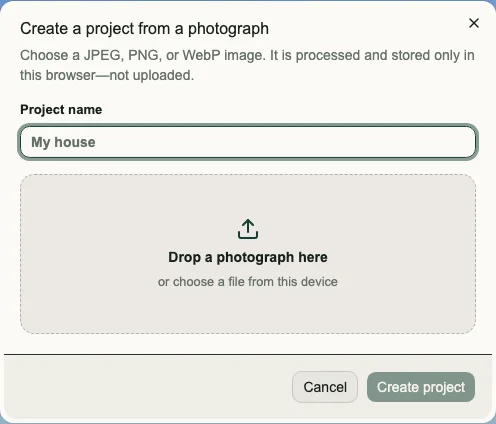
Choose a photograph that exposes the decisions.
Use a clear, high-resolution photograph with the house facing the camera. A useful photograph shows the roofline, wall planes, openings, trim, and base without cars, trees, or people blocking the surfaces you want to evaluate.
- JPEG, PNG, or WebP
- Even lighting and visible texture
- Minimal foreground obstruction
The photograph and project stay in this browser. Use Back up project if you need a recoverable copy.
Step 02 · Plan before drawing
One zone should answer one paint question.
Roof edges, frames, bands, or pergola pieces treated alike.
Wood or metal accents that should change independently.
A visually separate lower band—only when it is unobstructed.
Start with fewer zones. Split a zone only when the surfaces need different colors or materially different rendering.
Step 03 · Define masks
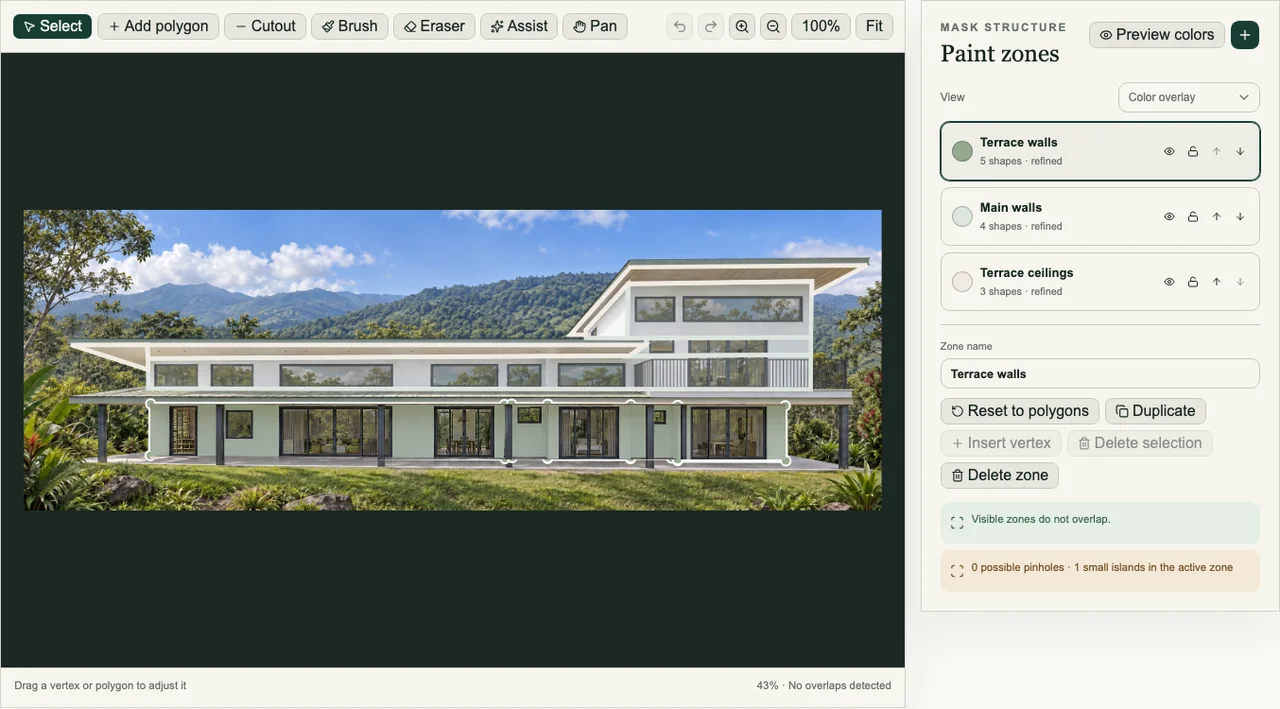
Trace the surface, then remove everything that is not paint.
- 1Add the outer geometry.
Use separate polygons for disconnected pieces.
- 2Cut out openings and obstructions.
Remove windows, doors, railings, and large foreground items.
- 3Check neighboring zones.
Shared edges may touch, but the visible areas should not overlap.
Do not use one large rectangle across an entire façade. It will recolor windows, openings, furniture, and vegetation along with the wall.
Step 04 · Refine and inspect
Use the right tool for the size of the correction.
Get the geometry right first. Then zoom in and correct local edge problems. Every committed edit can be undone.
Select
Move a polygon or drag individual vertices into place.
Zoom in before making small edge adjustments.Add polygon
Outline one continuous piece of a paintable surface.
Use more than one polygon when a surface is interrupted.Cutout
Remove windows, doors, openings, and foreground objects.
A cutout should sit completely inside an added area.Brush + Eraser
Correct small missed areas or spill after the rough geometry is right.
These are refinement tools, not a substitute for the main outline.Assist
Propose connected pixels inside the active zone polygon.
Inspect the cyan proposal and cancel it if it crosses an edge.Pan
Move around the photograph while working at a closer zoom.
Switch back to Select before editing vertices. Zoom in Adjust geometry Clean the edge Review or undo
Mask quality check
Before choosing colors, verify all six.
- The mask follows the wall or trim edge—not the roof, sky, or landscaping.
- Windows, doors, vents, railings, and large foreground objects remain untouched.
- Each zone represents one surface that should receive one paint color.
- High contrast view shows no unintended islands or gaps.
- The editor reports no visible overlap between zones.
- Preview colors preserves the photograph’s texture, shadows, and openings.
Step 05 · Prepare your palettes
Bring the colors you actually want to evaluate.
House Color Lab includes planning colors, and the personal workspace can also install palette files. Use color data supplied by a paint maker or supplier, a spreadsheet you maintain, an Adobe Swatch Exchange file, or a palette previously exported from House Color Lab.
Built-in planning colors
Ready to browse immediately. They are useful for exploring a direction but are not manufacturer matches.
CSV or Excel
Use an official supplier download or your own table. Include a name or code and either Hex or separate red, green, and blue values.
Adobe ASE
Import supported RGB swatches and groups from design software as an Adobe Swatch Exchange file.
House Color Lab export
Move or restore an installed palette with its exported .house-color-lab.json file.
Minimum spreadsheet data
Name or paint code + Hex, or name or code + R, G, and B.
Useful optional data
Family, collection, LRV, and Lab values improve organization.
File limit
JSON, CSV, XLSX, XLS, and ASE files must be 5 MB or smaller.
Use palette data you created, received with permission, or obtained from an authorized download. Preserve the provider and attribution during import, and confirm final choices with current physical samples—screen and catalog values can differ from applied paint.
Import workflow
From a file to an installed library
- 1Open Actions → Manage palettes.
Palette importing is available in the personal workspace.
- 2Choose Import a palette file.
The file is processed locally; the original is not retained.
- 3Map spreadsheet columns when asked.
Select the worksheet and confirm the required color fields.
- 4Describe and group the palette.
Add its provider and attribution; preserve source families, group automatically by color, or use one group.
- 5Review before installing.
Inspect colors and skipped rows. Install valid rows only after reviewing the downloadable error report.
Manage installed palettes
Keep reusable color libraries portable.
Imported palettes live in this browser under the current site address. Built-in palettes cannot be changed.
Export before moving or deleting
A palette export backs up the whole library. A project backup separately includes palettes referenced by that project.
Update or install a separate copy
Updates match exact paint codes and preserve saved internal identities; review the added, changed, and removed counts.
Rename, export, or delete
Deleting removes the library from the catalog. Existing projects and studies retain their saved color values.
Step 05 · Choose colors
Evaluate the whole composition, not isolated swatches.
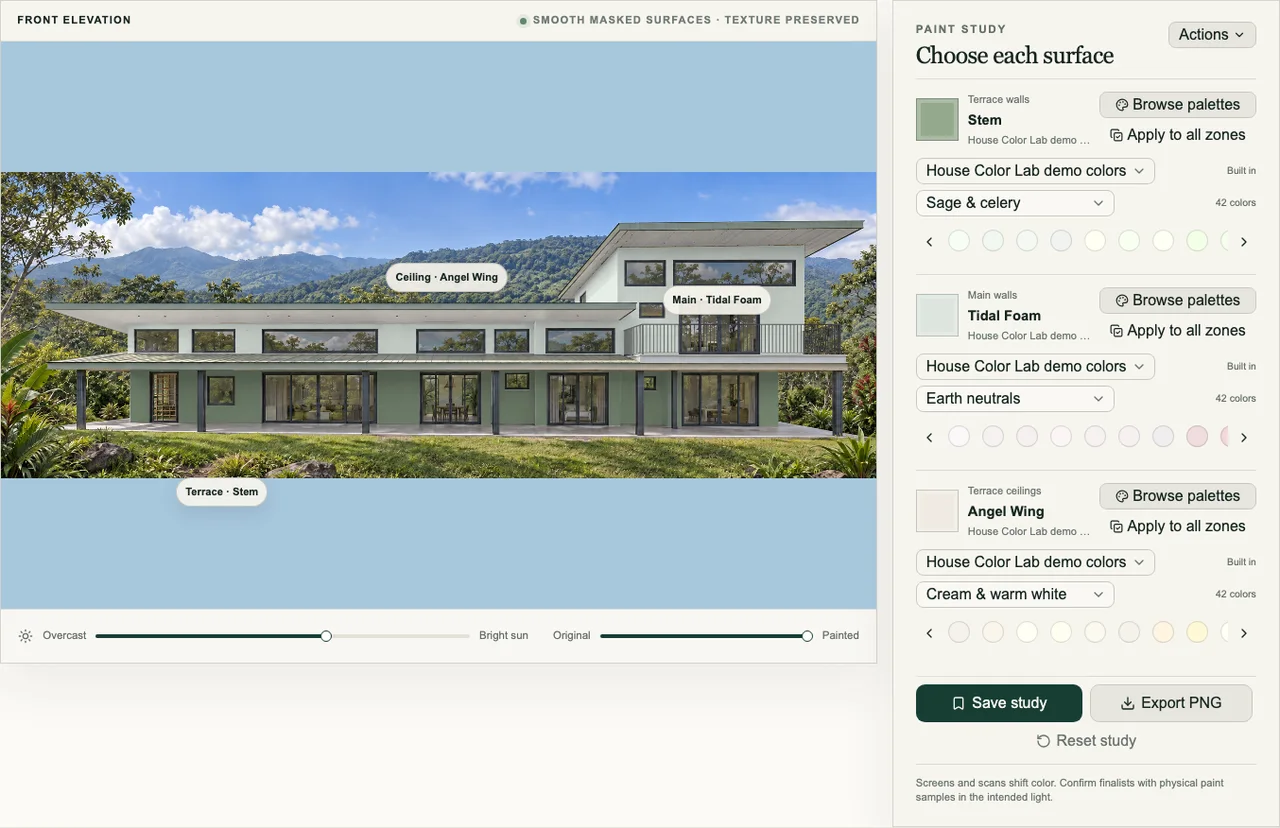
Pick a color for every zone and adjust the lighting control. Use the Original/Painted slider frequently so you notice mask spill or lost architectural detail early.
Start here when the selected surface already has a consistent base color.
Compare carefully when one zone begins with noticeably different tones.
Screen color is a planning aid. Confirm finalists with current physical paint samples in the intended light.
Color-selection panel basics
Work surface by surface, then judge the complete scheme.
Each surface card controls one zone. Changes appear immediately in the photograph and remain editable until you save a study.
Choose a library and family
Use the two selectors above the swatch strip, then click a swatch. The selected color shows its library, code, and Hex value.
Browse the full palette
Browse palettes opens every installed library. Search by color name or code, filter by collection, or move between families.
Apply one color to all zones
Use Apply to all zones for a quick monochrome starting point, then replace individual accents or trim colors.
Adjust the viewing conditions
Move Overcast/Bright sun to test lighting. Use Original/Painted often to verify the recolored area and texture.
Use the Actions menu
Manage palettes, compare saved studies, return to mask editing, or swap prepared wall colors where that action is available.
Save before resetting
Save promising schemes as studies. Reset study returns the project to its starting colors and default viewing controls.
Step 06 · Save and compare
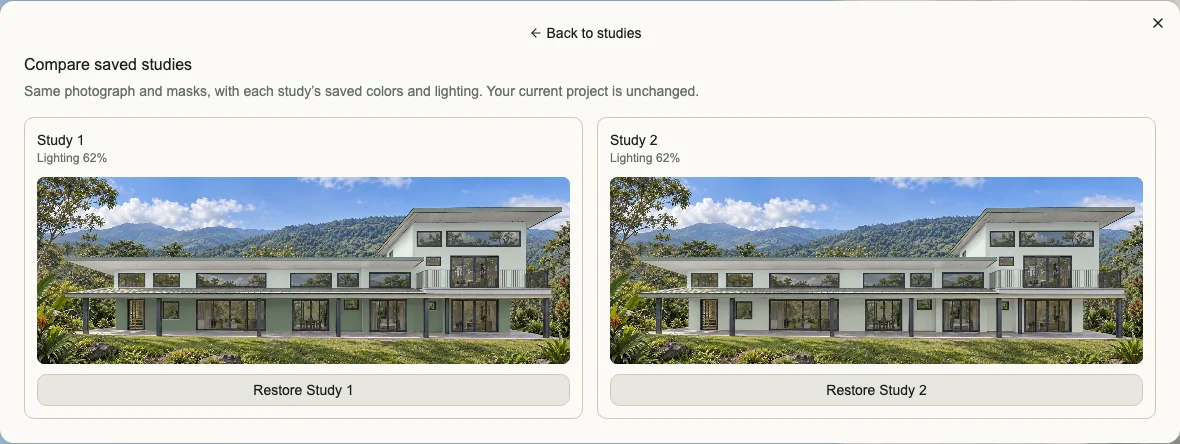
Compare complete schemes under the same conditions.
Save promising combinations as studies. Give each one a useful name, mark finalists, then compare two at a time. A saved study keeps its colors and lighting without changing your current project.
Step 07 · Export and protect the work
Export the picture—and separately back up the project.
Export PNG creates a shareable painted image. Back up project protects the original photograph, zones, refined masks, saved studies, and referenced palettes so the work can be restored later.
Export PNGShare the visual result.Back up projectPreserve the editable source.
Keep this manual open beside the app